Getting Started with TikSwipe
This page takes a fresh WordPress install to a working swipe feed. Budget about fifteen minutes: TikSwipe has fewer moving parts than the other tube themes, because a feed needs less configuring than a grid.
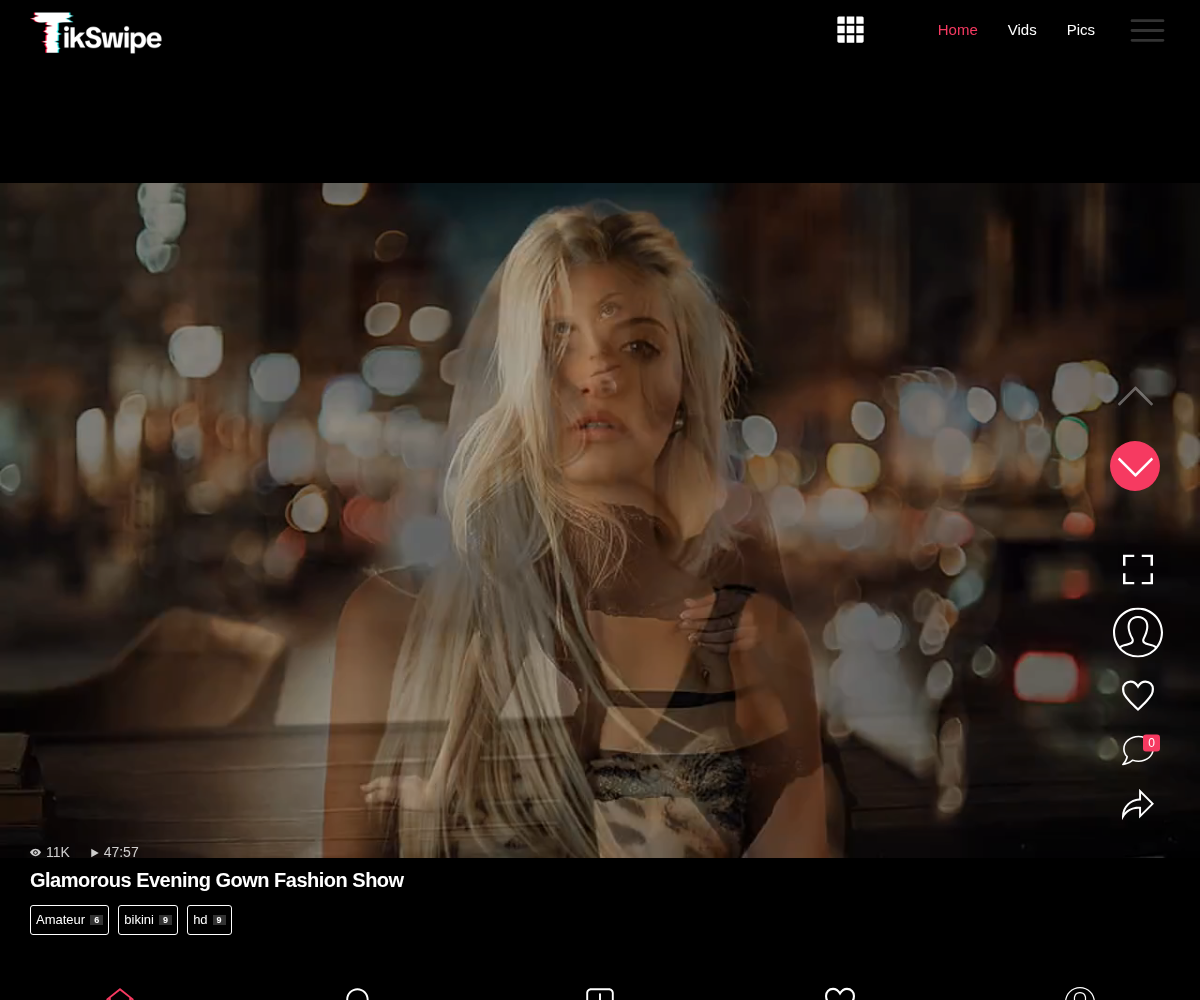
Here is what you are building.
1. Before you start
TikSwipe is a WordPress theme, so you need a WordPress site first: a domain, a host, and WordPress installed on it. If you are not there yet, start with Getting Started.
2. 1. Install WP-Script Core
Every WP-Script product is activated through the WP-Script Core plugin, so install it before the theme itself: How to install WP-Script Core.
Once it is active, activate your site with your site key: Site key activation.
3. 2. Install the theme
Download the TikSwipe zip from your account, then in WordPress go to Appearance → Themes → Add New → Upload Theme, choose the zip and activate it. The full walkthrough is in How to install a WP-Script theme.
WordPress expects the archive itself. Uploading an unzipped folder over FTP
works too, but it has to land in wp-content/themes/tikswipe/, with style.css
directly inside it.
4. 3. What activation does for you
TikSwipe builds the whole site on its first activation. It creates seven pages, each on its own template:
Vids, Pics, Search, Favorites, Creators, Add Content and Edit Profile.
It also creates a Header navigation menu holding Home, Vids and Pics, and
attaches it to the header when no menu is there yet, and it sets the permalinks
to /%category%/%postname%/.
So unlike the other themes there is nothing to create, and nothing to fix in Settings → Permalinks. All of this happens once, at activation: you can change the permalinks, pick another menu or rename a page afterwards, and the theme leaves your choice alone.
The pages are tracked by the theme, not by their title or slug, so renaming one never makes the theme create a duplicate. To see which page plays which role, or to create one again after deleting it, open the Pages tab of WP-Script → Theme Options.
5. 4. Set your logo
TikSwipe can draw a logo from two words, or use an image you upload. Pick which in Logotype.
If you upload an image, upload the logo for white pages too. Most of the theme is drawn on black, but a few screens are not, and a white logo disappears on them.
6. 5. Add your first video
Videos are ordinary WordPress posts with the video post format:
- Go to Posts → Add New.
- Set the post format to Video.
- Fill the video fields in the TikSwipe - Video information box below the editor. Every field is covered in Video Information.
- Publish.
The feed is built for portrait video, the way phones shoot it. A landscape clip still plays, but it sits in a letterbox with black above and below, and it looks out of place next to portrait ones.
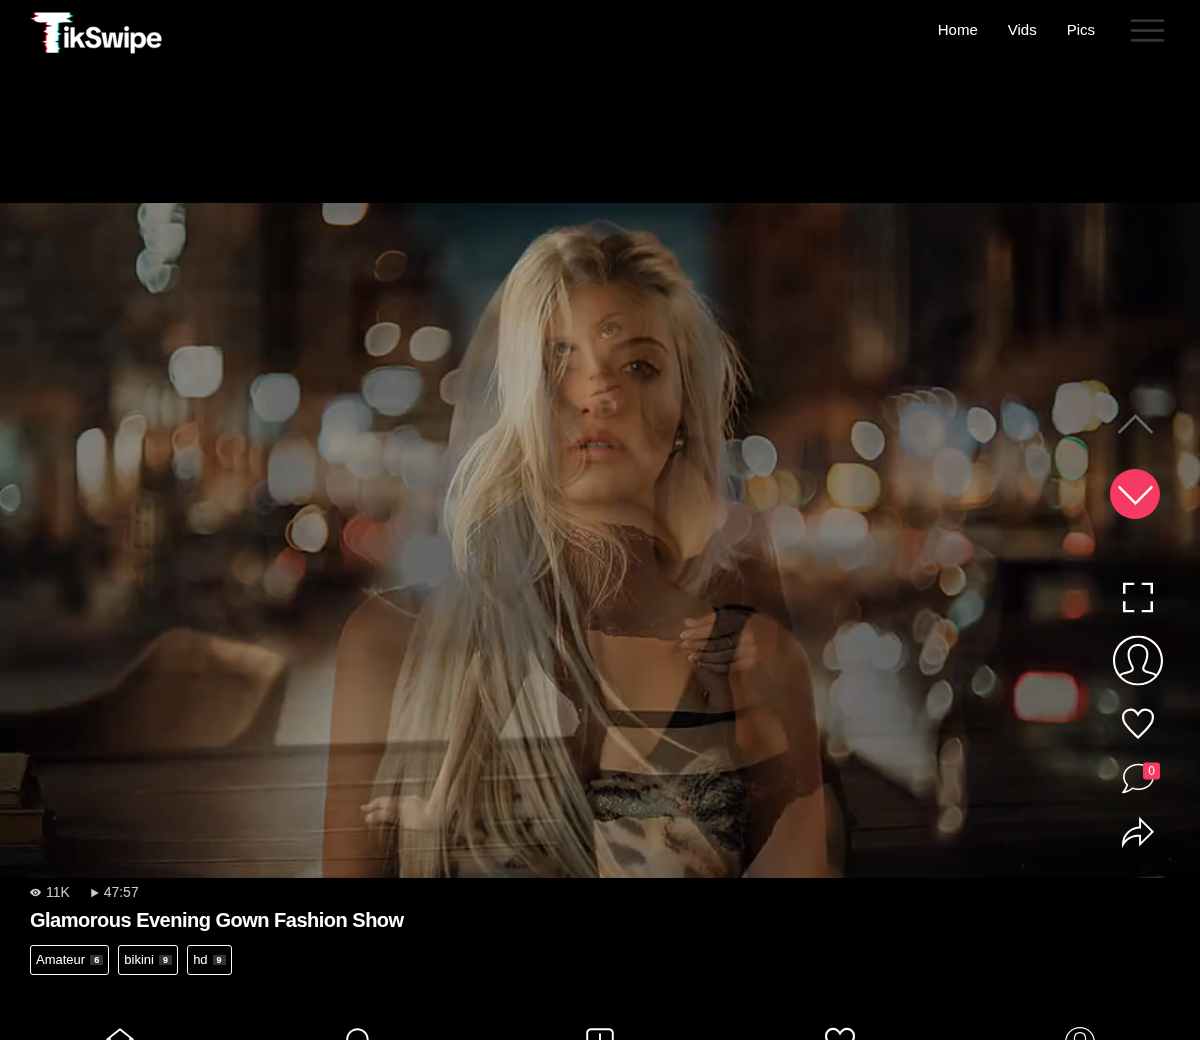
A published video fills the screen, with the actions down the right-hand side:
And on a phone, which is what the theme is designed for:

7. 6. Decide about creators
TikSwipe can let registered visitors post their own content, through the Add Content page. It is switched on in General, along with the status of what they post: published straight away or held for review.
It is the theme's main feature and worth deciding on early. See Creators.
8. 7. Make it yours
The theme's settings live in the WordPress Customizer, at Appearance → Customize. There are only four sections:
- General for autoplay, sound and creators
- Appearance for the accent colour and the corners
- Logotype for the logo
- Advertising for ads in the feed
Nothing is applied until you click Publish.
The theme also has a page of its own, at WP-Script → Theme Options. Its General tab only points you to the Customizer, its Pages tab manages the seven pages and their slugs, and its Texts tab explains the languages.
9. 8. Your language, and your visitors' texts
TikSwipe is translated into English, German, Spanish, French, Hindi, Italian, Portuguese and Russian, and the two sides of the site follow two different settings:
- Your visitors see the theme in the language of the site, set at Settings → General → Site Language.
- The admin, Theme Options included, follows the language of your own profile, at Users → Profile → Language. You can run a French site from an admin in German, and each admin user can pick their own.
To change a text your visitors see (a menu label, a button, a message), open
Appearance → Customize → Texts. A pencil appears next to every text you
can change in the live preview: click it, type your text, and see it replaced
as you type. A field left empty keeps the translated text of the site language,
shown in grey. Keep the codes of the original text, like %s or %1$s: they
are replaced by a number, a name or a link, and a text missing one is ignored.
10. 9. Rename a page or change a slug safely
- To rename a page, edit its title in Pages. The theme finds it by its id, so nothing breaks and no duplicate is created.
- To change the address of a page, for example
/vids/to/videos/, change its slug in the Pages tab of the Theme Options, or in the page editor. The old URL is redirected (301) to the new one, which WordPress does not do for pages on its own.
11. Where to go next
- Options documents every setting the theme has.
- Creators explains accounts and front-end posting.
- Page Templates covers the seven pages.
- FAQ answers what people ask most often.
- Troubleshooting is where to look when something does not appear.